 It's rare that designers get to start on a project from scratch. It's likely that work has been done in the past. As designers, we need to understand why and how we got to where we are to inform future design work.
Sometimes a designer will inherit designs and it's not clear what the decision-making process was. In the past there have been blog posts on how to create a design history, focused on documenting every detail of past design work and managed by specialist contributors such as interaction designers.
In this blog post, we'll take you through how to make sense of the design history of your project and make it useful and practical for future teams.
This will help you and your team to:
- avoid duplication by building on what's been done already
- build a summary view of previous work and design decisions made
- identify recommendations for next steps
While there is no one way to do it, this post provides some general recommendations that can benefit every project.
How to get started on your design review
Start by establishing the purpose of the work. This will determine the audience, help build a narrative on why and how it could be useful in future, and guide us on which tool would be most accessible and the level of detail required to get the points across.
Define the narrative
Identify how the work relates to the wider service roadmap, organisational goals, and any relevant decisions that need to be made. This will help establish a focal point to centre the information on, creating a narrative that is useful and practical for teams to engage with and pick up.
You could do this by asking some basic questions such as:
- What was the purpose of the project?
- Who is the audience for this write-up?
- How does this project relate to wider organisational goals?
- Which objectives and possible key results does it relate to?
- How does it feed into the current strategies?
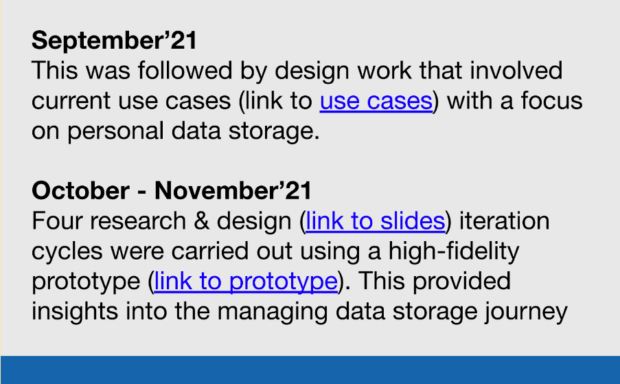
For example, we had to pause a project that was looking into managing and storing personal data in order to address other urgent priorities. To make sure any insights generated were repurposed, we focused the review on the core proposition of data handling and storage and how that would fit into the broader context. This helped build a narrative to maintain the relevance of the work. So when another project team was exploring a similar proposition, they were able to see the connections and reuse any work or design components.
Using the right tool
Use an accessible and collaborative tool to make it easy to collate, maintain and add evidence as the project evolves. This means choosing a tool that is widely used by your organisation and that requires less of a learning curve. This is useful not only for designers, but anyone wanting to learn about previous work.
We found Google Slides to be a good format to collate data by easily dropping in evidence (such as images, text, and spreadsheets) and adding content in the ‘notes’ sections to get things moving. Slides also provide a useful constraint: when presenting, we use fewer words and plain English to help us tell a story. It helps focus on storytelling and gives you the possibility of linking to more detailed information elsewhere while making the core narrative easy to present and share with a whole team.
Find out who did what
Once the materials are collected it's time to organise, review and recommend.
Begin with investigating who was involved previously, especially designers and the period they were there for. You might need access to any documentation, prototypes, or sketches they have produced.
But we also believe it's good practice to acknowledge those designers and the work that has led to where the project currently is. So make sure you find out who they were and give credit where it's due.
This won’t always be straightforward. You might find someone’s name on a document or a GitHub repo, and sometimes, if you are lucky, there might be someone in your organisation who knows who these people were.
We suggest you start by asking within your organisation first and reach out to the community through workplace communication tools. Then, look for prototypes (for example in Figma, Heroku, Sketch), Github Repos, and team drives. You might spot a name that will lead you to find the work.
Once you can trace previous designers and their work, it is useful to identify the status of the project in which they were involved. The status of a project can change swiftly, so establishing this provides an anchor point. Examples of this could be using the agile project phases, such as ‘discovery’, ‘alpha’, ‘beta”, and “live”.
You might not know your audience
There could be different audiences for your design review. So while introducing the background to the work, it is important to define and explain any specialist terms used in the review to avoid confusion. Even words like “data”, for example, could be perceived in many different ways, so, it's good practice to let the readers know what sort of data you are referring to.
Further, the audience brings their own perspectives. So to establish common ground, it is good practice to lay down the challenges, limitations and blockers you are experiencing while carrying out the review. For example, making the audience aware of any gaps due to missing materials, and circumstances impacting the direction of the work such as tight deadlines and scope changes.
Put things in a chronological order
The next thing is to organise all the previous work done in chronological order with key highlights of the work, any associated evidence, and the design decisions involved. Add dates where possible.
You can always link off to documents, prototypes and other artefacts if people decide to look for more detailed information.
Get a first draft done and then gather feedback by sharing it with the team. This can be done by creating a skeleton of the sections for information that is needed, or it can be a rough idea of the design activities and a timeline, for example. Do this as often and early as possible so people can help by adding the missing information.
Identify insights, gaps and opportunities
Part of this work is to also evaluate what’s been done; this transforms the collection of data and context into information. Identify insights, gaps and any opportunities that could be explored by the new team picking up this work. Add your suggestions based on your analysis and provide recommendations grounded on evidence.
Finally, it is a good idea to conclude the review with any assumptions you might have identified. These could be areas that lack supporting evidence or haven’t been tested yet. One useful way of doing this is in the form of questions, providing the future team with some direction as to how things were concluded.
Share the work
Once you’ve got the design history documented, it has a useful and practical point of view, and it's been reviewed by the team, it's important to think about future designers and future teams.
By sharing the work across the organisation more people will know about the history of the work, and it's more likely to stay in people's minds and be referenced back. This is when having a slide format helps to easily present it to wider audiences.
Make it easy to find by using a standard naming convention. People don’t know what they don’t know. You’ve done all this work to collect previous design work, make sure you think carefully about where to host this information so that people don’t have to redo this work in the future, or risk teams starting from scratch. This could be a wiki, an intranet, a Google folder, or a Github repository. Whatever works best for people in your organisation.
What’s next
There are many ways in which you can conduct design reviews and help your team start from what’s been done already. If you have joined a team where previous design work has happened, we’d love to hear from you. What challenges have you faced in trying to piece information together? What have you learned? Share in the comments below.


2 comments
Comment by Rinto posted on
Thanks Arindra Das & Ignacia for this post. Great to see that design documentation is a pain point echoed in different teams.
I used the DfE design history before and it is great to communicate the details of what has changed. Currently, I am trialling documenting design decisions in Confluence (preferred choice by organisation) with a format that I think will communicate the essentials. They are:
- overview (what is the problem and how do we know this is a problem)
- user need / user story
- hypothesis
- what has changed (include screenshots) and design rationale
- user research insights (if the design underwent testing)
- previous versios (link to the previous documentation page for the same issue / feature)
Keen to see an example of what you have done to document. Is that something you can forward?
Comment by Arindra posted on
Hi Rinto, Thanks for your comments, really interesting.
Would love to know more about how you are using Confluence.
I'll be in touch with you to share an example.