On 23 March 2020, the decision was made to stop driving tests due to the coronavirus (COVID-19) pandemic. This blog post is a case study showing how a multi-disciplinary team worked together at pace to create an emergency service in 34 days that helped 30,000 critical workers to book a driving test.
Background
For the third time in its 85-year history, the driving test service was suspended because of lockdown. The other 2 previous times were because of World War 2 and the Suez Crisis in the mid-50s.
A temporary replacement service, that ran from 23 March 2020 to 14 August 2020, was built by the team at the Driver and Vehicle Standards Agency (DVSA) and launched in 34 days to enable critical workers to still apply for practical and theory tests.
The team included service designers, user researchers, performance analysts, content designers, developers, testers and platform engineers. The service allowed for 110,000 practical and theory tests to be applied for and prioritised health and social care workers, who accounted for 40% of all applications.
The timeline of events
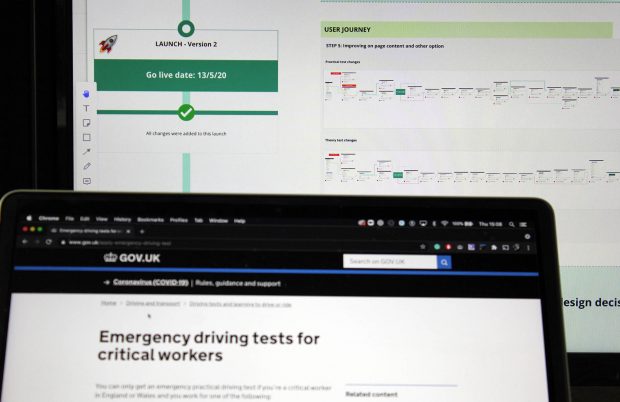
On 24 April, after a GDS peer review on 8 April, the service was launched. It became the first COVID-19-related service across government to go live.
The service then had a follow-up GDS peer review on 29 April and released a second iteration on 13 May 2020. There were 3 subsequent iterations of the service before it was taken down on 14 August 2020 once standard driving tests resumed.
How the team worked together
Due to the pace of the work, and the demand for a service to be launched, we wanted to ensure the team worked together effectively. With the advantage of domain knowledge and an in-house digital department, we created a dedicated team of experts and began the work straight away. The 3 key things that allowed us to maximise our efforts as a team and work at pace were: documentation, high-fidelity prototyping, and using the build-measure-learn feedback loop.
Documentation
Due to the team working from home, we knew the work had to be documented online. It also had to show the thought process and decisions behind our choices to enable anyone to understand why certain things were done. We decided to use a remote collaboration tool as the foundation for documenting our work, as it provided a suite of useful features that enabled us to build a comprehensive and shareable resource.
We initially identified 4 core areas for our documentation that would give the team the required information to learn about the project. These were user journeys, design changes, useful links and next steps.
These 4 core areas were grouped horizontally and were presented chronologically to highlight the key changes, thus providing the team with all the information they would need.
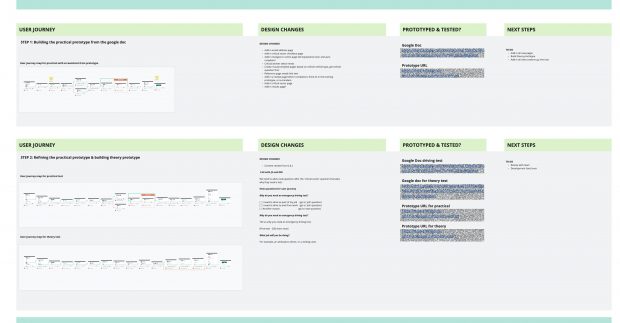
This was crucial in ensuring clarity whilst designing at pace, as team members could browse the resource to understand not only the latest version, but the iterations beforehand. This documentation structure also allowed users to understand how the design had evolved over time, as reading from the top down told the story of the service and our thinking at the time.
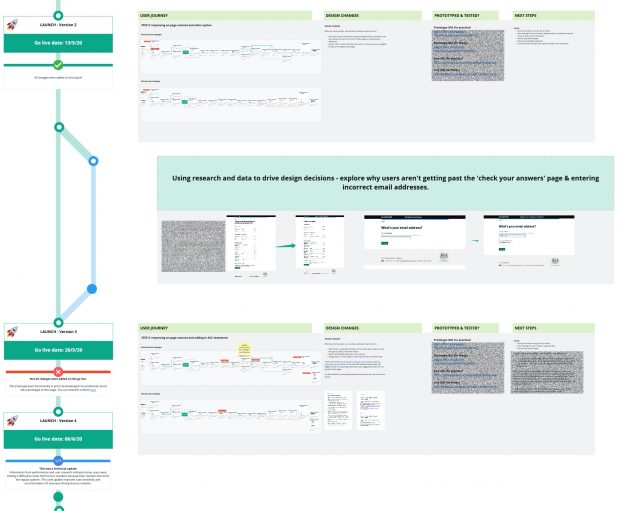
We built upon this structure by also introducing design and development lanes into our process. This quickly became a simple and effective way to illustrate the relationship between launches and exploratory work. By clearly defining the nature of the swim lane, users could jump straight to the live version or understand the exploratory work that happened in between.
After the initial launch, each design lane highlighted the research and design ideas we had at the time and would eventually ‘merge’ into the development lanes to form the latest iteration.
High-fidelity prototyping
As we had prior knowledge of how this service should work, and the questions we should ask, we decided to jump straight into the prototyping stage by taking advantage of the great resources provided by GDS, the GOV.UK Design System and the GOV.UK Prototype Kit. This allowed us to quickly create a user journey that was reliable and had components that had been well-tested across the public sector.
We also added JavaScript to our prototypes to create an interactive user journey that included error messaging and dynamic components. This allowed the team to understand the different user journeys depending on the users’ actions and gave the team a much clearer view of how the pages should work.
We used our documentation to record our journeys, and Heroku to share them. This allowed the team to understand how the new service should work and was a great way to get feedback.
By creating high-fidelity prototypes and updating the user journey maps regularly, we quickly established a working style that enabled the team to see the latest user journey, provide feedback on this journey, and view the proposed next steps. This provided all members of the team and stakeholders one resource they could rely on to view the progress of work.
Build-measure-learn
Another important step in our design process for this piece of work was adapting quickly to the information we received on the service after its initial launch. On a daily basis we would discuss the latest user feedback, and as a team establish any patterns for concern and improvements that could be made.
This feedback was added to our online documentation tool, inside of our swim lanes, to show everyone involved the problems we found, our initial ideas and concepts, and the design decisions that took place. This level of detail further illustrated to stakeholders how we measured, learned, and thus adapted the service based on the information we received.
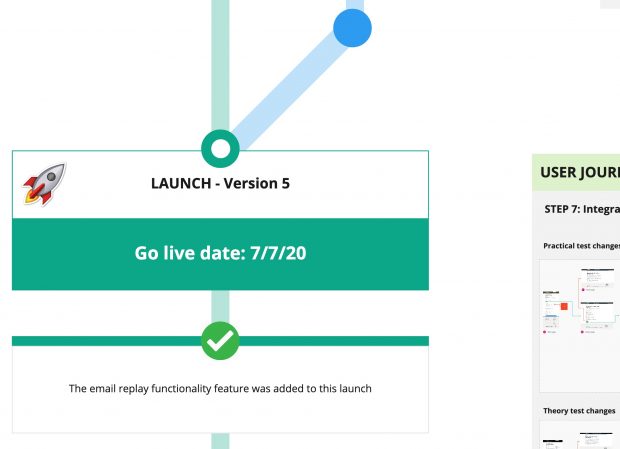
Once improvements were added to the service, we introduced alert cards into our documentation to indicate the feature had been added. This was a great way to indicate what had ‘merged’ into the development swimlanes once we were happy with the work in the design phase. From here, we were able to use our design history alongside service metrics to gauge the change in performance on our service once features had been pushed to live, as we had a clear idea of the timeline.
Conclusion and key lessons
It may seem counterintuitive to suggest making sure you are detailed in documenting your work when you’re designing at pace, but for us, this way of working became a crucial resource we used on a daily basis to provide clarity and discuss the decisions that had been made and what the next steps were.
Key lessons
Below are some bonus key lessons we learned when doing this work.
- Find a documentation style that works for your team, and start documenting as early as possible
- Make time for documenting your design work even when under pressure – future you and others will be thankful!
- Capture all your ideas - showing the work that didn’t make the cut builds the story and further validates the best option
- Documentation can be an effective tool used for communication
- Documentation can be a great resource for extracting information when needed
As a design team, we’re keen to take what we learned from this back to our core services to improve how we document going forward. Watch this space!