Working on prototypes, a lot can change quickly. It’s good to have a record of previous iterations so you can revisit the changes and decisions you made in the past.
I like to keep a running log for each round of research, recording what hypothesis we set out to test, how it worked, and what changes we will make for next time. Following Gemma and the Service Manual team’s example, I’ve started archiving the prototypes so we can go back and see how it has developed over time.
This is useful to compare different iterations of a design side-by-side and to track progression over time.
A super-easy guide to archiving
Using a combination of git, GitHub and Heroku, making an archive is easy. The trick is to use tags.
Tags in git are like bookmarks or pointers to a specific point in history. You could do this with branches, but they can have commits added to them and change over time, whereas tags are immutable and can’t change. This makes them perfect for versioning. (Also I don’t like having a lot of branches messing up my repositories!)
Once you have tagged your iteration you can then create a Heroku app to host it. Heroku lets you have up to 5 apps on a free account, but you can verify your account by adding a credit card for 100 apps (no money is charged to the credit card).
I’ve created an example to demonstrate how to archive prototype iterations. This blog post will walk through the steps I took:
1: Create a tag
I have one main Heroku app (username: iteration / password: prototype) which always has the latest version of the prototype, and I list all the previous versions in the index file.
The first iteration of the example prototype shows a simple form. My commit history looks like this so far:
$ <b>git log --oneline</b>
0abc6fe Create index page
9f2a306 Add confirmation page
3189f09 Add summary page
c600139 Add question page
dda25b5 Initial commit
All the code shown is from the Terminal. You only need to type the code in bold, the other code is what the computer outputs. The $ symbol means the computer is expecting input.
Once your prototype is ready for testing, it's time to create a version. To do this, create a tag with the following command:
$ <b>git tag version-1</b>You can leave a message with your tag, similar to commits. This is known as an annotated tag.
$ <b>git tag -a version-1 -m "First iteration of form for research"</b>It’s probably easiest to use lowercase letters and hyphens instead of spaces in the name of your tags.
2: Push the tag to Github
Then push the tag to Github:
$ <b>git push --tags origin master</b>You should be able to see that git has pushed your tag to the remote
To git@github.com:alextea/iteration-prototype.git
9f2a306..0abc6fe master -> master
* [new tag] version-1 -> version-1
I also deploy the prototype to the main Heroku app:
$ <b>git push heroku master</b>3: Create a new Heroku app
Each version of the prototype will be hosted on a separate Heroku app. To do this, you can create Heroku apps on the command line using the Heroku Toolbelt.
$ <b>heroku apps:create iteration-prototype-v1 -r heroku-v1</b>This also adds a remote to your repository called heroku-v1
4: Deploy the version on Heroku
Now push to deploy the prototype version to the new Heroku app
$ <b>git push heroku-v1 master</b>You can view this iteration of the prototype at http://iteration-prototype-v1.herokuapp.com (username: iteration / password: prototype)
Rinse, and repeat
Later on, when I’ve added some more commits, and we are ready for the next round of research. The commit history now looks like this:
$ <b>git log --oneline</b>
bc44d11 Add link to previous version to index
3eedb3e Set service name in config
d7dec39 Use “one thing per page”
0abc6fe Create index page
9f2a306 Add confirmation page
3189f09 Add summary page
c600139 Add question page
dda25b5 Initial commit
You may have noticed that the last commit is to add a link to the previous version to the index page. This makes it easy to revisit previous iterations of the prototype to see how it has evolved. We can now create the version-2 tag, and push the tags and code to Github and our main Heroku app.
$ <b>git tag -a version-2 -m "Prototype with one thing per page"</b>
$ <b>git push --tags origin master</b>
$ <b>git push heroku master</b>
Once again we create a new Heroku app, add it as a remote and push to it:
$ <b>heroku apps:create iteration-prototype-v2 -r heroku-v2</b>
$ <b>git push heroku-v2 master</b>
Version 2 of the prototype is at http://iteration-prototype-v2.herokuapp.com (username: iteration / password: prototype)
Finally, I made the prototype save and display user input:
$ <b>git log --oneline</b>
76d0f4b Update index with link to previous version
aa42f73 Show the name of the month
212336f Display data on summary page
63c092e Update forms to save data to session
cb0a66e Create dynamic form route
6cc14af Install express-session to save session data
bc44d11 Add link to previous version to index
3eedb3e Set service name in config
d7dec39 Use “one thing per page”
0abc6fe Create index page
9f2a306 Add confirmation page
3189f09 Add summary page
c600139 Add question page
dda25b5 Initial commit
I created another new Heroku app and deployed my code to it. You can see version 3 of the prototype at http://iteration-prototype-v3.herokuapp.com (username: iteration / password: prototype) and I have the main Heroku app which lists all the previous versions at http://iteration-prototype.herokuapp.com (username: iteration / password: prototype).
You can list the tags like so:
$ <b>git tag -n</b>
version-1 First iteration of form for research
version-2 Prototype with one thing per page
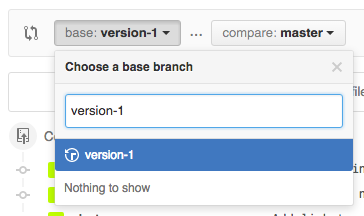
version-3 Prototype now saves and plays back dataYou can view your tags on Github by clicking the releases tab. You can compare changes between tags using the compare view, by either typing in the URL in this format: github.com/username/repo/compare/tag1...tag2 or by choosing a branch, clicking the compare button, then typing the tag name into branch selector.
Tagging previous commits
If you need to tag a commit you made in the past you need to checkout the commit and add the tag.
$ <b>git checkout cb0a66e</b>
$ <b>git tag version-1.2</b>
If you want to push an older tag to Heroku the easiest way to do it is to checkout the tag then create a temporary branch.
$ <b>git checkout version-1.2</b>
$ <b>git checkout -b old-tag</b>
You can then push the branch to the Heroku remote.
$ <b>git push heroku old-tag:master</b>Further reading
More information and documentation on tagging is available on the git website.

3 comments
Comment by Vicky posted on
This looks great ... however on my team we have me (interaction designer), the content designer, and an apprentice developer all working on the repo (Github yay!) - how would this work with multiple collaborators?
Comment by Vicky posted on
Never mind - re read and answered my own question. I suspect that one person does archiving, the others just work on the current version!
Comment by Alex Torrance posted on
Hi Vicky, that's right – you can continue to collaborate as usual, and it doesn't have to be the same person doing the tagging each time either.